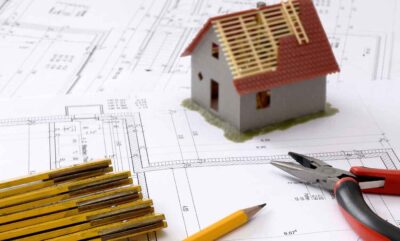
Stage 1: Budget Planning
Building a house depends on many components, and achieving the desired result requires thorough planning. Initially, it’s essential to understand your needs and desires, as successful house design always takes into account the future resident’s requirements. The first stage of building your own house also involves understanding your financial capabilities for the construction.
Consultation with a Loan Manager
Visit a bank and consult with a financial advisor or loan manager to understand your financial capabilities for building a house. Ask the bank about their financing scheme for house construction. Typically, banks finance house construction in stages. If you plan to use bank financing, it would be wise to build the house according to the stages offered by the bank.
Construction Budget
The average cost per net square meter for a turnkey house is approximately 1650 euros (plus VAT). By an average house, we mean a one-and-a-half-story house with medium-range interior finishing materials and heated by an air heat pump, ready to move in.
House construction is a significant and time-consuming venture. The price of a house depends on thousands of small details, but with conscious and well-thought-out planning, you can influence the cost without having to give up anything, if you consider the following points:
Land
Access roads to the plot are often forgotten. Constructing longer access roads can easily constitute 10% or more of the house’s price. Consider this when buying a plot. Prefer plots where all utilities are available.
Architecture
Complex architectural solutions require intricate structural solutions, inevitably increasing the cost of building a house. The shape of the house (square, rectangle, or other) also affects the price. The most cost-effective is to build a rectangular house with few projections.
Choosing between a single or double-story house with the same square meters, a double-story house is usually more cost-effective. This is because it has a shorter foundation and smaller roof area than a single-story house with the same square footage.
Foundation Cost
A crucial component for achieving a quality final result in house building.
House Building Cost
In general, the price of a turnkey house consists of three parts:
- 65% – house construction (structure and related parts such as foundation, house frame, roof, and openings).
- 20% – special parts – electrical, heating, and water/sewage systems.
- 15% – finishing work and materials.
Stage 2: Choosing the Plot
The plot is a decisive factor in house construction, especially if it is located in a densely populated residential area. When selecting a plot, it’s crucial to thoroughly understand the planning regulations of the residential area, as these determine the construction rights and the type of house that can be built. The planning conditions specify the number of floors, the shape of the house, external color solutions, and how the house should be positioned relative to the cardinal directions. To avoid unpleasant surprises, such as discovering the plot lacks an electrical connection or that construction isn’t possible in the chosen location, check the following points before purchasing the plot. It’s also advisable to find a knowledgeable real estate agent to assist with the purchase.
Plot Size
Always verify the plot size from the Land Board’s information database. The area of the cadastral unit may sometimes differ from the stated sizes.
Detailed Plan
Ensure the plot has a valid detailed plan, which divides the land into plots and determines construction rights, designates areas where building is allowed, etc. A detailed plan is mandatory in most areas and is required before drafting a building project and applying for a building permit.
Geobase or Geodetic Base Plan
Also known as a topo base, digital or design base, and is essential for various design works. It’s necessary for further planning, such as drafting building projects.
Construction Restrictions
The detailed plan’s explanatory memorandum specifies the definitive construction rights and usage conditions of the plot, including the total buildable area, maximum building height, minimum distance between buildings, and maximum number of buildings. It also shows access to the plot, restriction zones, electrical cables, sewer pipes, and other infrastructure.
High Vegetation
If there is a forest or grove on the plot, know what can and cannot be cut down. Some large trees may be part of the area’s environmental value and cannot be touched without permission. Unauthorized cutting can result in fines and the obligation to plant new trees.
General Plan of the Area
Research the area of the desired plot. Look at the local government’s general and detailed plans to see what buildings or complexes are planned in the coming years.
Neighborhood
If possible, do background research on the area. What is the standard of living there? Who will be living around your future home? Visit local stores to get a feel for the community.
Land Designation
Always check the designated use of the land before making a purchase. It’s not always residential, and changing the designation at the local government level is not always successful.
Personal Preferences
Never underestimate the type of home and atmosphere you desire. Consider noise levels, proximity to transportation, your lifestyle, and what amenities you need nearby.
Access to the Plot
Ensure there is access to the plot. Check for any servitudes before purchasing.
Infrastructure
Consider the availability of public transport, proximity to essential amenities like grocery stores, schools, and leisure facilities.
Utilities Connection
Don’t assume that utilities are connected and paid for. Check the status of connections and be aware that new connections can be costly.
Soil Type
The nature of the soil (moisture, proximity to groundwater, type of soil) greatly affects construction costs. Poor soil conditions can significantly increase the cost of foundations and infrastructure.
By addressing these factors, you can make an informed decision and avoid potential problems in the future.
Stage 3: Architectural Design of the House
To carry out the architectural design of a house, having a plot is essential, as the planning conditions of the plot can precisely define what type of house you are allowed to build. When designing the architecture, various conditions related to the plot are considered: slopes, access, municipal requirements, sun movement, etc., as well as the planned budget.
A high-quality and long-lasting construction/building is based on a well-thought-out and comprehensive house project. The more prepared the client is, the quicker the process can move forward.
Typical Architectural Solution
A typical architectural solution means that the house manufacturer or builder has developed a series of standard house projects. In these standard solutions, architects and designers have collaborated to create an architecture that looks good and is cost-effective to build. These often include structural node solutions, which are not usually the focus of an architect working solely on architecture, as they typically lack insight into the costs of various building solutions.
Advantages of a Standard Solution
A key advantage of a standard house project is that it significantly shortens the process for the client, even when modifications are made to the standard solution. Building a house according to a standard architectural solution is generally more affordable than using a custom project, as technical node solutions are already developed by the manufacturer.
Typically, house manufacturers have examples of houses built according to their standard architectural designs, giving clients a clear idea of what their future house will look like.
Limitations of a Standard Solution
The biggest limitation of a standard architectural solution is the limited scope for modifications. Clients often wish to make changes to a standard design, but even minor modifications to load-bearing structures can necessitate the redevelopment of the entire house’s technical node solutions. This could negate any cost benefits, effectively resulting in a custom architectural solution.
Custom Architectural Solution
A custom solution allows for the development of a house plan and architecture based on your needs and tailored to your plot. Expect a longer timeframe with a custom solution, as the architecture is developed based on the client’s requirements, necessitating close collaboration.
House Construction
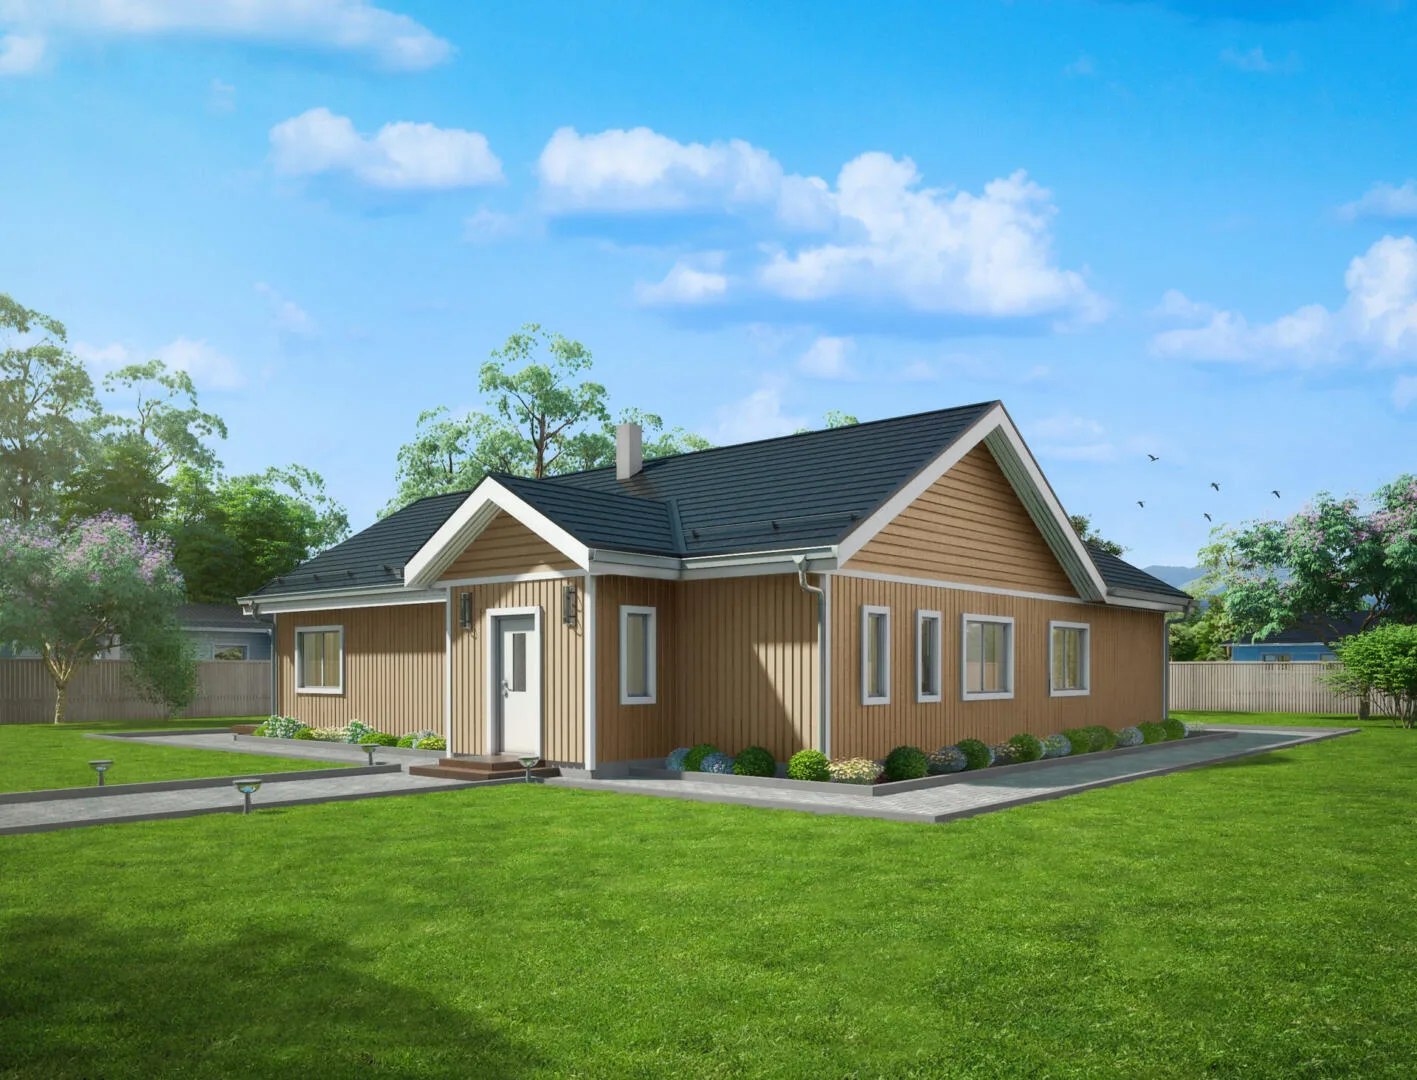
With the architectural solution in place, you also need to decide on the construction material for your future house. The most common materials are wood and stone. The choice often depends on various reasons, including emotional ones. Many clients want a house that looks like a stone house but with the quick construction and energy efficiency of a wood house.
House Energy Efficiency
Deciding on the energy efficiency level of your future house is an integral part of the architectural process. The desired energy efficiency level initiates a comprehensive process that determines the insulation, ventilation, and heating solutions for the construction.
Heating Costs and Energy Efficiency
When discussing a house’s energy efficiency or energy class, clients typically want to know the heating costs associated with different energy classes. To determine the estimated heating costs, the entire energy efficiency package of the house needs to be established first. We offer our clients the opportunity to model the energy efficiency of their planned house. This will provide precise information on the future heating costs and the most suitable energy class for your budget.
Energy Efficiency of the Construction
The common thermal conductivity indicator (U-value) for energy-efficient exterior wall construction is 0.16 W/m2K. The lower the U-value, the more energy-efficient the construction. For a passive house, the U-value of the exterior walls is around 0.10-0.08 W/m2K.
We can produce house constructions according to the client’s preferences. The secret to air tightness lies in the installation. Uncontrolled air movement in a construction can lead to moisture, resulting in wall dampness and the growth of harmful molds and fungi.
To prevent moisture-related damage, it’s essential to use vapor and air barriers with variable moisture resistance. The drying capacity of the construction should always be greater than the anticipated moisture load.
Current regulations require that critical nodes of a building’s envelope be completely air-tight. Modern constructions should not use simple vapor barriers, but certified vapor and air barrier systems.
Proper installation of the air and vapor barrier system is crucial to ensure good air tightness. Without quality and careful installation, the house will not achieve the desired air tightness.
Energy Classes and Efficiency Numbers for Small Houses
- Passive House – ≤ 15 kWh/(m2a) (For comparison; not linked to regulations)
- A Class – ≤ 50 kWh/(m2a)
- B Class – 51 ≤ 120 kWh/(m2a)
- C Class – 121 ≤ 160 kWh/(m2a)
- D Class – 161 ≤ 210 kWh/(m2a)
- E Class – 211 ≤ 260 kWh/(m2a)
- F Class – 261 ≤ 330 kWh/(m2a)
- G Class – 331 ≤ 400 kWh/(m2a)
- H Class – ≥ 401 kWh/(m2a)
The energy efficiency number is calculated considering all device energy consumption, as well as the house’s air tightness and the thermal conductivity of the envelope. According to the current government regulation “Minimum Requirements for Energy Efficiency,” it is recommended that a new small house have an energy efficiency number of at least 160 kWh/(m2a), meaning that its energy class should not be lower than B.
What is a Near-Zero Energy Building?
A near-zero energy building is an A-class building according to current minimum energy efficiency requirements, with an energy efficiency number up to 50 kWh/(m2a).
What is a Low-Energy Building?
A low-energy building is a B-class building according to current minimum energy efficiency requirements, with an energy efficiency number up to 120 kWh/(m2a).
Stage 4: Sketch and Proposal
Once the architectural drawings are in place, whether it’s a standard or custom project, the next step is to review with the builder or house manufacturer what content and level of readiness you desire for your new home. A proposal is then prepared based on your wishes and the architectural project.
Comparing proposals can be complex as different manufacturers offer varying package contents. It’s crucial to thoroughly examine the content of each proposal and, if possible, consult with a construction specialist.
Stage 5: Finalizing the Deal
Once the right house is found and a schedule is established with the house manufacturer, you can proceed to finalize the deal and move on to applying for a building permit.
Stage 6: Building Permit Process (1 to 6 months)
After finalizing the deal, the next step is to apply for a building permit. Depending on the location, this process can take anywhere from 1 to 6 months. This stage also involves a fair amount of paperwork. Once all the paperwork is completed and permits are obtained, construction can begin. Concurrently, plans are made for heating, water, and ventilation systems related to the house.
Building Permit Process and Project Types
- Applying for Design Conditions from Local Authority: These determine the constructional requirements such as height, width, roof slope, permitted materials, the proportion of the building on the plot, necessary consultations, etc.
- Architectural Project Commissioning: This is divided into three parts: sketch, preliminary project, and main project.
- Sketch – For principal approval with the local authority.
- Preliminary Project – For obtaining a building permit, specifying dimensions, materials, plans, views, sections, technical systems, and placement on the plot.
- Main Project – Details various elements, nodes, specifications of doors and windows, etc.
- Coordinating the Sketch: After reaching an agreement on the sketch with the architect, it needs to be approved by the local authority and sometimes neighboring properties.
- Geodetic Base Plan: This is obtained from a geodesist who digitally surveys the plot along with existing utility networks.
- Developing Preliminary or Main Project: The architect then develops the preliminary or main project, orders the energy label, and starts coordinating it with necessary authorities like the Fire Department, Municipal Office, local government, utility network owners, etc. At this stage, involving an engineer and an interior designer is recommended.
- Approval Process: Once preliminary approvals are obtained, pay the state fee and submit the project to the local government. The local government processes the project for up to 30 days, during which the project is either approved or returned for revisions.
- Construction Start Notification: After obtaining the building permit, notify the local government three working days before starting the construction.
Depending on the complexity and smoothness of the process (various approvals), obtaining a building permit can take an average of 1 to 6 months. It is advisable to involve an engineer and an interior designer from the design phase, as their input can lead to changes. The builder should also be involved, as their skills and experience might further influence the project.
For larger and more complex buildings, consider commissioning additional projects like structural design, interior design, water and sewage projects, and electrical projects.
Once the building permit is obtained and notification is given, construction can begin.
Stage 7: Manufacturing (1-3 months)
Once the house’s architecture is finalized and the building permit is in place, the manufacturing stage of the house can begin.
Designing
Before actual factory production, engineers need to carry out the structural node solutions, in other words, the designing of the house begins. The duration of the design phase varies depending on the size and complexity of the house but typically takes a few weeks. The outcome of the design phase is a comprehensive building project documentation, including technical solutions and drawings.
For standard projects, the design phase is already completed, so no additional time is required.
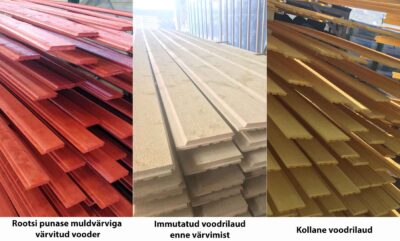
Factory Production of the House
Based on the project documentation, the production of wooden elements begins in the factory. The wooden elements are manufactured according to the complexity ordered by the client.
Advantages of Factory-Built Houses:
- Construction is much faster and more cost-effective than traditional house building.
- Building materials are protected from the weather during construction.
- Quality and delivery times are always reliable.
- Ordering construction from a manufacturing firm saves clients from misunderstandings with builders.
- The house is well-constructed, and its market value does not decrease over time.
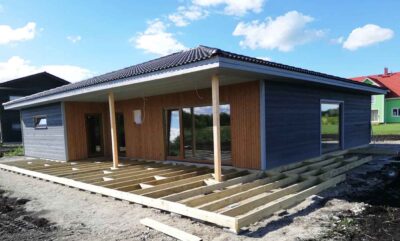
Stage 8: House Assembly (1-4 months)
The first stages of construction include groundwork and foundation laying. Allocate 4-6 weeks for foundation, other preparatory works, and heating, water, and ventilation systems. Depending on the size of the house, the actual building process lasts from 1 to 4 months.
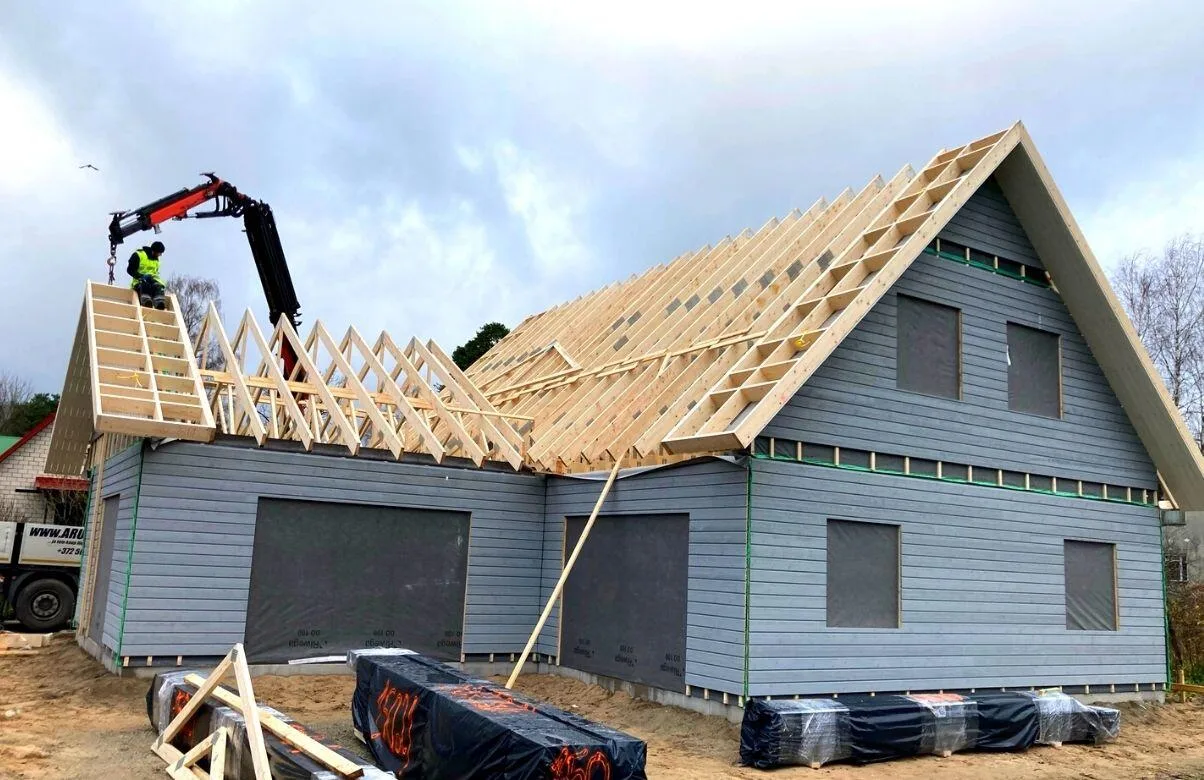
House Assembly
Following the successful completion of the previous stages, the final stage of house construction begins.
House Assembly means that the prefabricated wooden elements produced in the factory are transported to the site and assembled into a complete house structure. After assembly, external construction work, specialized tasks, interior finishing, and landscaping can begin.
Stage 9: Occupancy Permit and Documentation
An occupancy permit is a crucial document needed for yourself, the local municipality, and the bank. You’ll need to submit various documents in the required format, such as the building inspection act, construction project and diary, covered works acts, construction meeting protocols, audits, setup and testing protocols, implementation drawings of utility networks, post-construction geodetic surveys, and fire safety documents.
Stage 10: Warranty Period
From the moment the house is handed over, a construction warranty period begins, lasting 2 years. During this time, the builder is obligated to rectify any construction faults at their own expense. If you have found a reliable builder, you can be confident that the company will be available to perform any warranty work even two years later.